Quick Tip: How To Add a Printer in Windows 10Quick Tip: How To Add a Printer in Windows 10
Most modern printers use technology that makes them easily discoverable on your home network but if you need to add an older printer manually that is also possible.

Windows 10 is capable of recognizing and automatically adding printers on your home network that use the Universal Plug and Play (UPnP) protocol.
If you already had a printer on your system running Windows 7/8.1 then it will be present after upgrading to Windows 10. If you are performing a clean install of Windows 10 and your printer is UPnP compatible then Windows 10 will install that printer and make it your default and no further action is necessary to have printing capabilities.
However, if for some reason your printer does not show up or is an older printer that is not UPnP capable then you can attempt to manually add that printer to Windows 10.
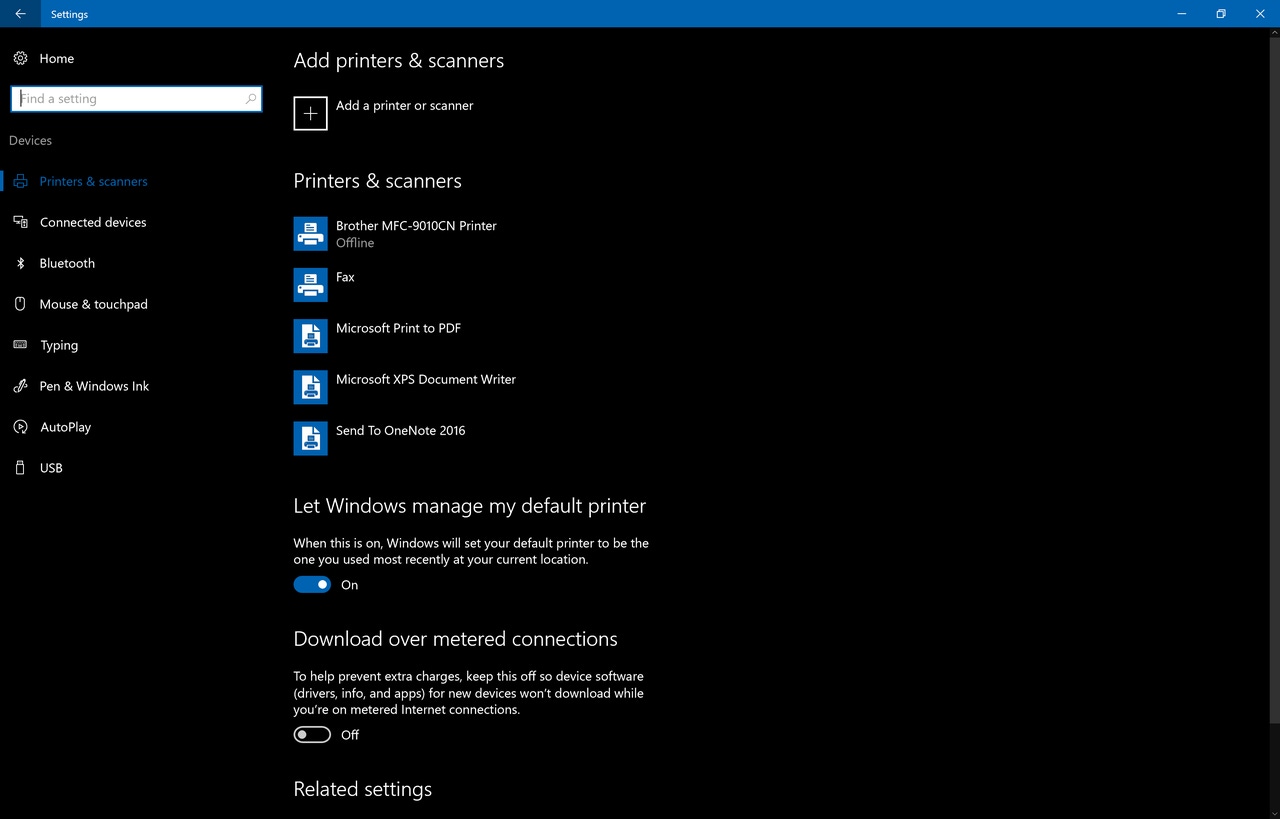
Just go to Settings > Devices > Printers & scanners and click/tap the Add a printer or scanner to start scanning your local network for printers.
If the printer you are looking for appears as a result then just click on it to add it to your system.
If it does not show up then you can pull up the advanced options for searching for the printer. Just click/tap The printer that I want isn't listed to open the advanced dialog.
That will then open up this dialog with more options for searching for your printer:
All of these options are self explanatory and may require extra information as indicated to get that printer discovered and installed on your system.
For the vast majority of Windows 10 users these advanced options will not be needed because printers over the last few years have the protocols built in that make them easily identified on your home network.
But, wait...there's probably more so be sure to follow me on Twitter and Google+.
About the Author
You May Also Like
.jpg?width=100&auto=webp&quality=80&disable=upscale)
.jpg?width=400&auto=webp&quality=80&disable=upscale)


.jpg?width=700&auto=webp&quality=80&disable=upscale)
