How To Recover Disks From Windows Storage Spaces PoolsHow To Recover Disks From Windows Storage Spaces Pools
Follow these steps to recover a disk from a storage pool and prepare the disk for reuse.
January 6, 2023

I recently ran into a somewhat unusual situation. Two disks in my primary storage array failed on the same day. The array continued to function because it was configured as a RAID 6 array, but I knew that I had to fix the problem quickly because it could not sustain an additional disk failure. I did not have spare disks on hand, however. Being a few days away from Christmas, acquiring disks proved challenging.
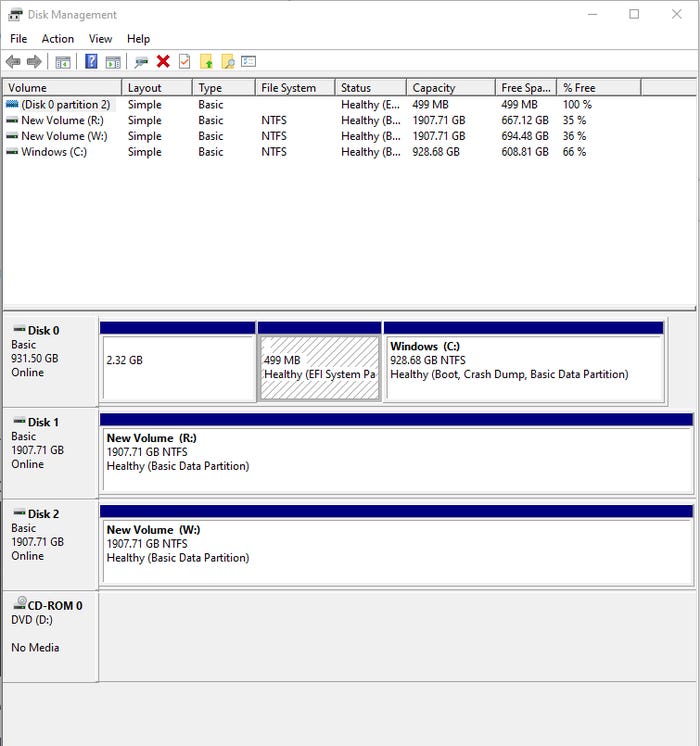
I had a couple of recently deprovisioned lab servers with disks that I could use as temporarily replacements. Those disks had previously been a part of a Windows Storage Spaces pool. I temporarily installed one of the disks into a Windows machine so that I could remove the existing partitions, but Windows refused to acknowledge the disk’s existence.
Reuse 1
Figure 1. Windows does not acknowledge that the disk has been installed.
Ultimately, I had to resort to using Windows Storage Spaces to fix the problem, even though I wasn't using Storage Spaces on the machine where the disk was temporarily mounted.
Eject the Disk From the Storage Pool
To remove Storage Spaces data from a disk that was previously part of a storage pool, enter the Control command at the Windows Run prompt. This will cause Windows to open the legacy Control Panel. Next, click on System and Security, followed by Manage Storage Spaces. Windows will display any disks belonging to a storage pool.
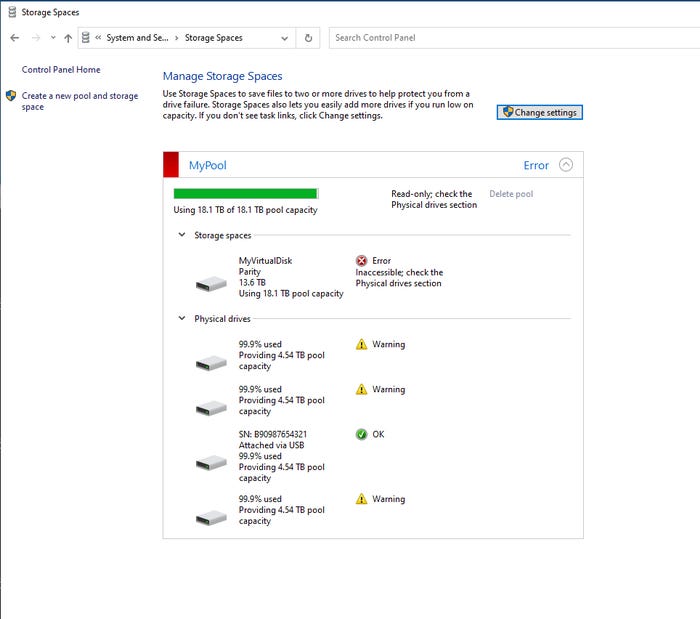
As you can see in Figure 2, a virtual disk previously consisted of four physical disks, only one of which is present in my system. You will also notice that the option to delete the pool has been grayed out.
Reuse 2
Figure 2. Windows Storage Spaces identifies the disk that has been installed.
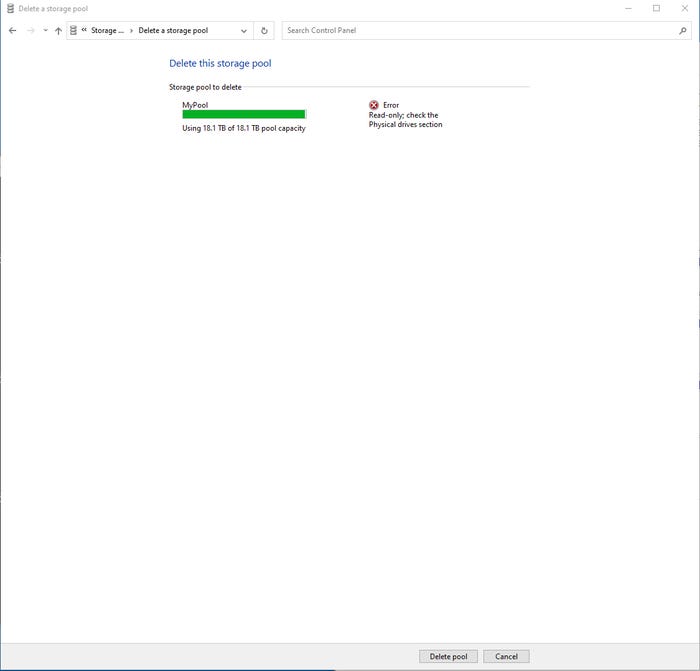
To make the Delete Pool option available, click the Change Settings button at the top of the window and then click the Delete Pool link. Windows will then display a screen like the one shown in Figure 3. Confirm the operation by clicking the Delete Pool button at the bottom of the screen.
Reuse 3
Figure 3. Click the Delete Pool button to remove the storage pool.
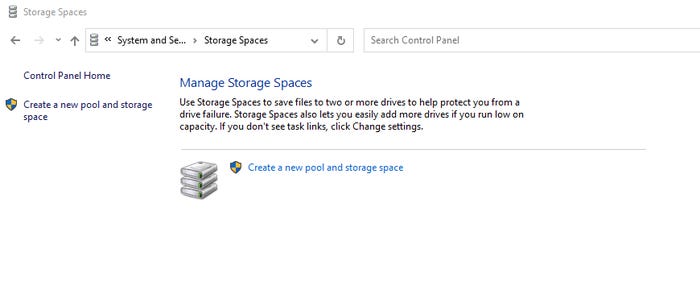
After a brief pause, the Storage Spaces screen should refresh and indicate that no storage pools currently exist. In Figure 4, you can see that there is an option to create a storage pool, but no existing storage pools are listed.
Reuse 4_0
Figure 4. The disk has been removed from the storage pool.
Remove the Data from the Disk
Although the disk has been removed from the storage pool, it is not quite ready to reuse. After all, you have ejected the disk from the pool, but have done nothing to remove the data from the disk.
The easiest way to finish the process is to open the Disk Management Console by entering the DiskMgmt.msc command at the Windows Run Prompt. The disk should be listed among the other disks in the console. As you can see in Figure 5, Windows has assigned the drive letter E: to the disk that I just removed from the storage pool.
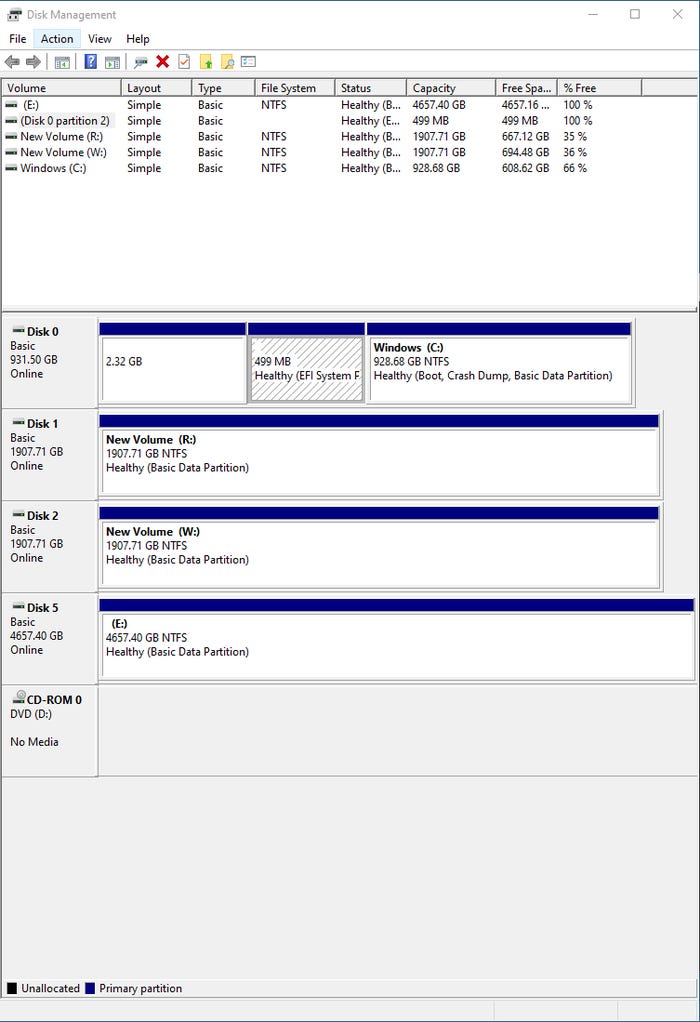
Reuse 5
Figure 5. The disk is now listed within the Disk Management Console.
Next, right-click on the disk’s volume, then select the Delete Volume command from the shortcut menu. When prompted, click Yes to confirm that you want to delete the volume. Right-click on the disk itself (not the space within the disk) and select the Offline command from the shortcut menu. You can see the now offline disk.
Now that the volume has been removed and the disk has been marked as offline, you can remove the disk and then reuse it in another system without issue.
About the Author
You May Also Like


.jpg?width=700&auto=webp&quality=80&disable=upscale)
