How To Integrate .NET Classes Into PowerShell ScriptsHow To Integrate .NET Classes Into PowerShell Scripts
PowerShell users can leverage .NET classes to develop more complex and efficient scripts. For example, you can generate GUI elements, a capability not natively supported in PowerShell.
June 10, 2024

In Part One of this series, we explored the concepts of .NET namespaces, classes, methods, and properties. Now let’s examine how to incorporate .NET classes into your PowerShell scripts.
Advanced PowerShell Techniques with the .NET Framework
Part 2: Integrate .NET Classes into PowerShell Scripts
The .NET API Browser
Before getting started, it’s important to know where to find .NET resources. Microsoft maintains an online tool called the .NET API browser, which offers an extensive database of .NET classes and methods. With the tool’s search interface, you can navigate this vast collection to find exactly what you need.
Visit the .NET API browser here: https://learn.microsoft.com/en-us/dotnet/api/
Example of PowerShell’s Limitations
We will revisit the .NET API Browser later, but for now, I want to explain a really simple PowerShell script that I created. Here is the code:
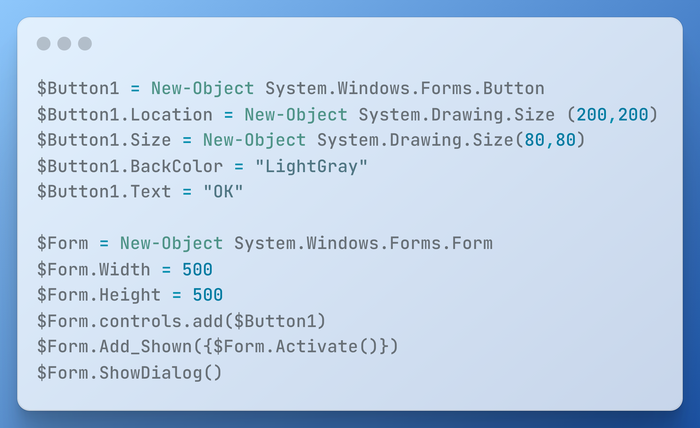
This code creates a simple GUI window (known as a Windows form) featuring an “OK” button. You can see the script’s output in Figure 1.
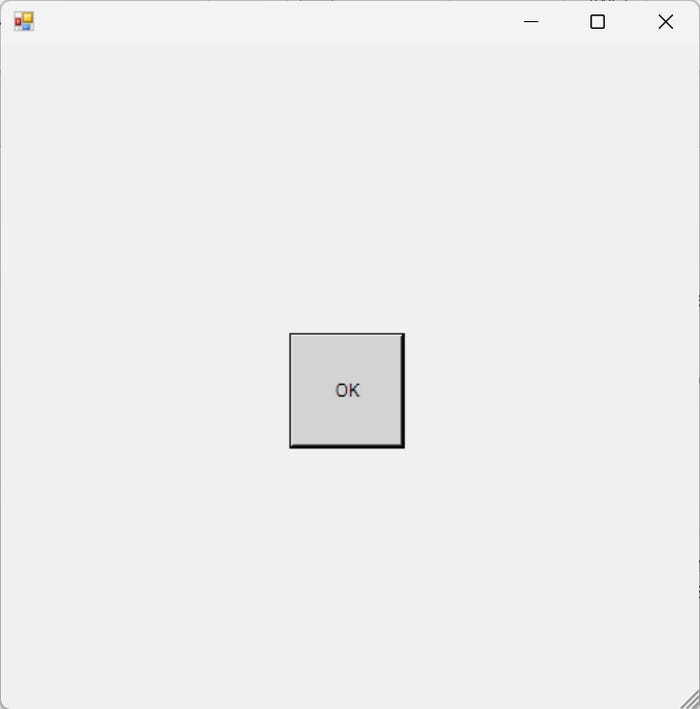
Figure 1. This is the output from the code shown above.
While this script seems trivial, it exemplifies PowerShell’s inability to generate GUI environments natively. The GUI elements were created using .NET.
When you create a PowerShell GUI, you must create a form, essentially a blank window. That form exists as a .NET object. From there, you must create separate objects for the GUI elements that will appear on the form (a button, in this case) and then add the objects to the form.
Here is the command that creates the form object:
$Form = New-Object System.Windows.Forms.FormIntegrating .NET Classes
So, let’s say that I knew nothing about building PowerShell GUIs besides the fact that it requires a form. In this scenario, the first step would be to click the .NET Framework option (.Net Framework 4.8, in this case) within the .NET API Browser. Once there, I would search on the word “Forms.” In Figure 2, you can see that the very first result is for the System.Windows.Forms namespace.
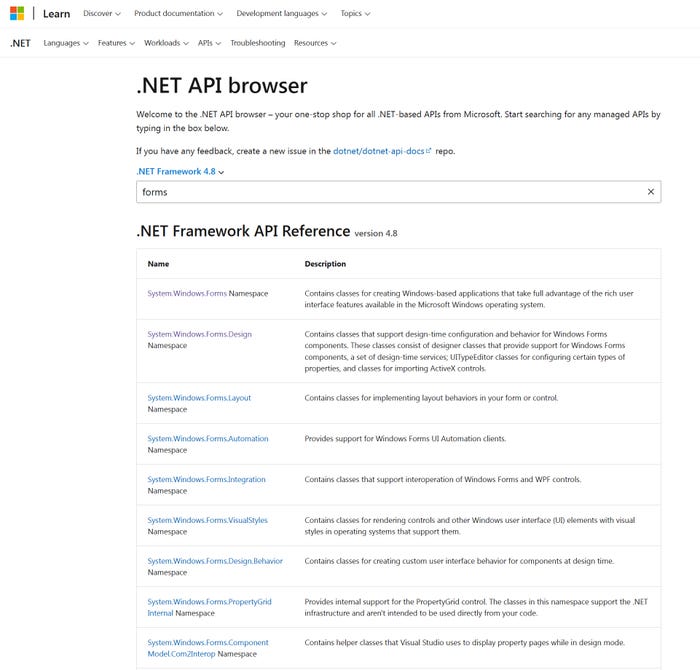
Figure 2. The first result is for the System.Windows.Forms namespace.
As you might recall, I mentioned the line in my script that creates the Forms object:
$Form = New-Object System.Windows.Forms.FormNotice that the .NET namespace is called System.Windows.Forms while my command refers to System.Windows.Forms.Form. The discrepancy is because the line of code that I wrote calls a .NET class, not the namespace itself. If I return to the .NET API browser and click the System.Windows.Forms namespace, it displays a list of the classes. In Figure 3, “Form” is the name of a class. Therefore, in my code, System.Windows.Forms denotes the namespace, and “Form” is a class within that namespace.
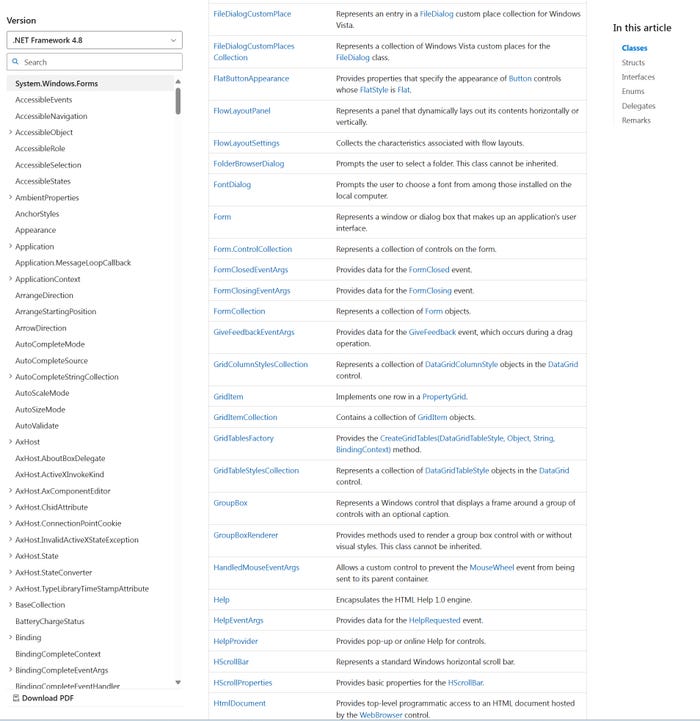
Figure 3. “Form” is the name of a class within the System.Windows.Forms namespace.
We can take this a step further. Recall that each GUI element consists of a separate object. The button in my GUI interface was created with this line of code:
$Button1 = New-Object System.Windows.Forms.ButtonHere, System.Windows.Forms is the namespace, and Button is a class within the namespace. Figure 4 shows Button listed among the classes.
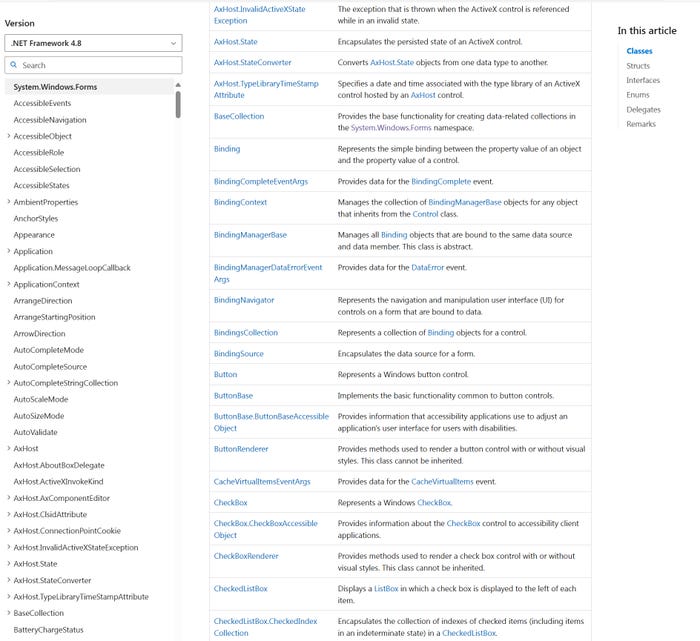
Figure 4. Button is the name of a class within the System.Windows.Forms namespace.
Recap: Using .NET Classes in PowerShell
The important takeaway is that PowerShell allows you to create objects corresponding to any .NET class. You just need to know the namespace and the class name you want to use.
Now that we have covered finding .NET namespaces and classes and incorporating them into PowerShell objects, let’s move on to methods and properties. I will discuss these techniques in Part Three.
About the Author
You May Also Like


.jpg?width=700&auto=webp&quality=80&disable=upscale)
