Building WPF GUIs in PowerShell: Beginner’s GuideBuilding WPF GUIs in PowerShell: Beginner’s Guide
This guide walks you through creating a PowerShell GUI with Windows Presentation Foundation. We will examine key differences from Windows Forms, focusing on how WPF uses a grid layout to position GUI elements.
January 9, 2025

Most of the GUI-based PowerShell scripts I have created rely on Windows Forms. However, Windows Forms has limitations, especially for more advanced GUI designs. In such cases, Windows Presentation Framework is a better choice.
While the Windows Presentation Framework (WPF) isn’t overly complex to learn, its approach to building GUIs differs significantly from Windows Forms. In this guide, I will show you the basics of creating a WPF-based GUI in PowerShell.
WPF vs. Windows Forms
One notable difference between Windows Forms and WPF is how you place GUI items on the window.
Windows Forms' pixel-based coordinates
In Windows Forms, you typically position items using pixel-based coordinates relative to the window’s upper-left corner (exceptions exist). For example, to add a block of text to a Windows Form, you would create a label object and specify its location like this:
$Label = New-Object Windows.Forms.Label
$Label.Text = "Hello World"
$Label.Location = New-Object Drawing.Point(100, 40)
In this code example:
The first line creates the label object.
The second line defines the text to display (i.e., “Hello World”).
The third line specifies the label’s position within the window.
The code positions the label’s top-left corner 100 pixels to the right and 40 pixels below the window’s upper-left corner.
WPF's grid system
Things work a bit differently when using WPF. Rather than using pixel-based coordinates, you generally use a grid system. In other words, you will create a grid within the window. Think of it as a spreadsheet: the grid consists of rows and columns, and you place objects in specific “cells” by referencing their rows and columns. While the grid layout is defined primarily by rows and columns, you can still use pixel values to set the row and column dimensions as needed.
Let’s revisit the previous example where we displayed a text label in a GUI environment. This time, we will use WPF instead of Windows Forms. I will start by showing only the part of the code that defines the label’s location on the window. The rest of the script will come later. Here is the code:
$Label = New-Object System.Windows.Controls.Label
$Label.Content = "Hello World"
[System.Windows.Controls.Grid]::SetRow($Label, 0)  [System.Windows.Controls.Grid]::SetColumn($Label, 0)
$Grid.Children.Add($Label)
The first two lines work the same way as the Windows Forms example. The first line creates the label object, and the second line sets the label’s text to “Hello World.”
The third line is where things begin to differ. The Windows Forms example specifies the label’s position using pixel values, where here I define the label’s position using two separate lines of code: one to set the row and another to set the column.
In the WPF code example, you will see that the row command includes the instruction SetRow($Label,0). The SetRow instruction tells PowerShell that we are defining the label’s row (rather than the column). The value inside the parentheses—$Label—indicates the GUI element, and 0 specifies that it should go in the first row of the grid.
Similarly, the subsequent line uses the SetColumn instruction, specifying the column for the label. Again, the values in the parentheses indicate the label ($Label) and the column number. Here, 0 refers to the leftmost column in the grid.
The final line of code adds the $Label element to the grid. The grid is defined earlier within the script.
The Full Script for the WPF Example
Now that I have shown you how to place objects within the grid, let’s take a step back and look at how to create the grid and the rest of the required code.
Here is the complete code:
Add-Type -AssemblyName PresentationFramework

# Create the application window
$Window = New-Object System.Windows.Window
$Window.Width = 800
$Window.Height = 600

# Create the grid
$Grid = New-Object System.Windows.Controls.Grid

# Define 3 rows and 3 columns
$Grid.RowDefinitions.Add((New-Object System.Windows.Controls.RowDefinition))
$Grid.RowDefinitions.Add((New-Object System.Windows.Controls.RowDefinition))
$Grid.RowDefinitions.Add((New-Object System.Windows.Controls.RowDefinition))

$Grid.ColumnDefinitions.Add((New-Object System.Windows.Controls.ColumnDefinition))
$Grid.ColumnDefinitions.Add((New-Object System.Windows.Controls.ColumnDefinition))
$Grid.ColumnDefinitions.Add((New-Object System.Windows.Controls.ColumnDefinition))

# Add a label to Row 0, Column 0
$Label = New-Object System.Windows.Controls.Label
$Label.Content = "Hello World"
[System.Windows.Controls.Grid]::SetRow($Label, 0)
[System.Windows.Controls.Grid]::SetColumn($Label, 0)
$Grid.Children.Add($Label)

$Window.Content = $Grid
$Window.ShowDialog()
Breakdown of the Script
The first line of code adds the PresentationFramework assembly to the script, allowing us to use the Windows Presentation Framework.
Next, we create the application window. We define a variable called $Window and set it equal to an object of type System.Windows.Window. We then set the window’s width to 800 pixels and its height to 600 pixels.
Following that, we create the grid by defining a variable called $Grid and assigning it to an object of type System.Windows.Controls.Grid.
The next step in the script configures the grid’s size. Unfortunately, PowerShell doesn’t allow us to specify a 3x3 grid directly. Instead, we must execute a separate command for each row and column we want to create.
To create the row in the grid, we use the following command:
$Grid.RowDefinitions.Add((New-Object System.Windows.Controls.RowDefinition))This command is repeated three times in the script, creating three rows. Remember, the numbering of grid rows starts from 0, so these lines create Row 0, Row 1, and Row 2.
After setting up the rows, we create the columns. The command to create a column is:
$Grid.ColumnDefinitions.Add((New-Object System.Windows.Controls.ColumnDefinition))We repeat this command for each column we want to add. Since our grid has three columns (Column 0, Column 1, and Column 2), we repeat this line three times.
The next code section creates the label element to display within the grid. It is the same code I covered earlier, so I won’t rehash it. However, note that the label is in Row 0, Column 0.
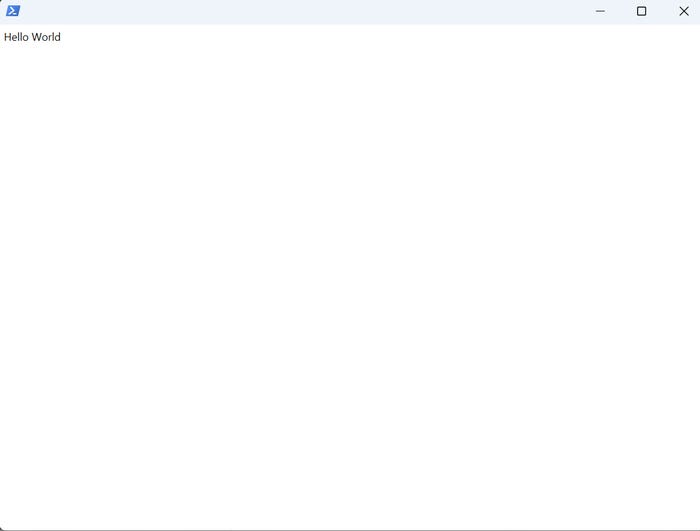
Wrapping up, the second-to-last line adds the grid to the window. The final line displays the window on the screen. You can see the script output in Figure 1.

Figure 1. The label, containing the words “Hello World,” is displayed in Row 0, Column 0.
Centering Elements in WPF
What if we want to move the “Hello World” label to the center of the window instead of having it appear in the upper-left corner? To do this, we must modify the SetRow and SetColumn instructions to specify a new location. Since the grid is 3x3, the center position is Row 1, Column 1. Here is how the modified lines of code would look:
[System.Windows.Controls.Grid]::SetRow($Label, 1)
[System.Windows.Controls.Grid]::SetColumn($Label, 1)
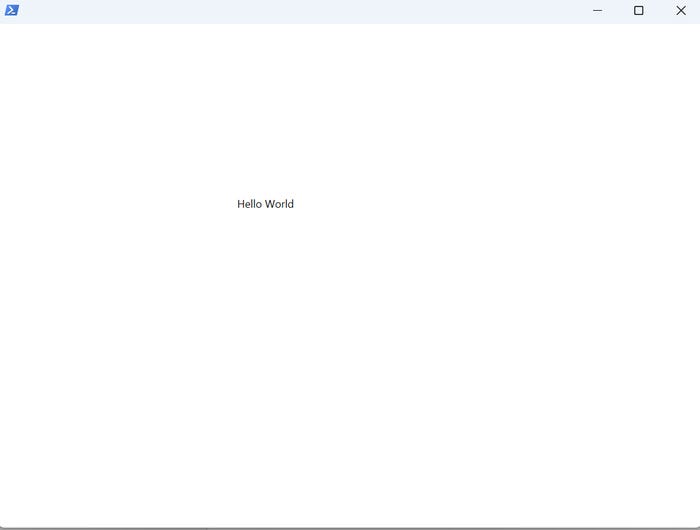
In Figure 2, you will see that while these changes moved the label closer to the center of the window, it is not perfectly centered. That is because the changes we made told PowerShell only the grid position. Even though we selected the center grid position (Row 1, Column 1), the text is shown in the upper-left corner of the designated “cell” within the grid, not its center.

Figure 2. The text now displays in the center grid position.
There are many ways to gain more precise control over the placement of objects within the grid. For example, we can define margins (padding) within the cells or dynamically adjust the size of the rows and columns. I plan to explore these options in a future article.
About the Author
You May Also Like


.jpg?width=700&auto=webp&quality=80&disable=upscale)
