How to Create a Shared Mailbox in Office 365How to Create a Shared Mailbox in Office 365
In shared mailbox, a group of users can send an email from a common email address like [email protected] or [email protected] . They can also read emails when they are sent to that common email address.
June 27, 2017

In shared mailbox, a group of users can send an email from a common email address like [email protected] or [email protected]. They can also read emails when they are sent to that common email address.
In this tutorial, I will show you to create a shared mailbox, add members, send an automatic reply, and forward emails to any other inbox inside or outside the organization when they are actually sent to shared mailbox.
Creating Shared Mailbox
Open portal.office.com in your web browser.
Sign In with work or school account (account should have sufficient privileges to add new domain such as Global administrator role).

3. Go to admin center.
4. Expand Groups and click ‘Shared mailboxes’. Click ‘+ Add a mailbox’.

5. Provide the name and email (Email can contain alphabets, numbers, periods and hyphens and should not start with any number. It should be unique within your organization) of shared mailbox. Click Add when you are done with entering the information.

Adding Members in Shared Mailbox
6. Click ‘Add members to this mailbox’

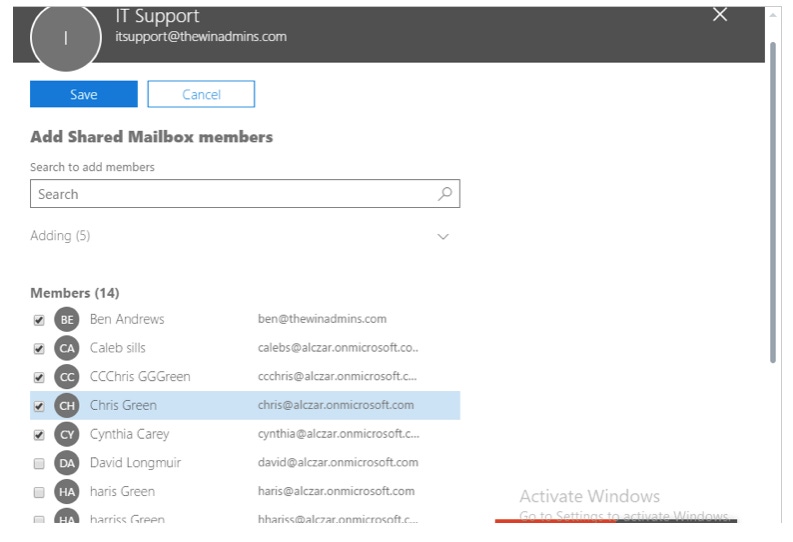
7. Click ‘+ Add members’. Check all those users you would like to add in newly created shared mailbox. Click Save when you are done.

4. Click Close.

Sending Automatic Replies from Shared Mailbox
1. In admin center, expand Groups and then click ‘Shared mailboxes’.
2. Select the desired mailbox you would like to set it for automatic reply. Click Edit in Automatic replies section.

3. Turn on the automatic reply by setting the toggle ON. Write a message in the text box to send it to people inside the organization.
4. Check the corresponding box if you would like to send an automatic reply to senders outside the organization and type the message.
5. Click Save.

Forwarding Emails that are Sent to Shared Mailbox
In admin center, expand Groups and then click ‘Shared mailboxes’.
Select the desired mailbox by clicking on it
Click Edit in Email forwarding section.

4. Set the toggle to ON. Provide forwarding email address (It can be from outside organization or it can be other shared mailbox ) and click Save. Also set the toggle to ON if you would like to keep a copy of forwarded email in the shared mailbox.

About the Author
You May Also Like


.jpg?width=700&auto=webp&quality=80&disable=upscale)
