Create a New Azure VM with PowerShellCreate a New Azure VM with PowerShell
Using PowerShell, you have a repeatable process to provision and access your SQL Server Azure VM environment, making the process consistent and much more easily manageable.
July 23, 2014

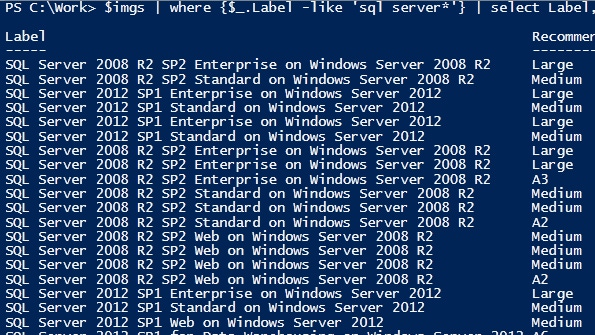
In Using PowerShell to Get Started in Microsoft Azure, I explained how to set up access to Microsoft Azure with PowerShell, but here's where things start to get interesting. There's a cmdlet called Get-AzureVMImage which returns all of the predefined Azure VM images you can choose from when setting up a new Azure virtual machine (VM). Since we're SQL Server people, here's how I get the list of available VMs specific to SQL Server.
$imgs = Get-AzureVMImage$imgs | where {$_.Label -like 'sql server*'} | select Label, RecommendedVMSize, PublishedDate | Format-Table -AutoSizeFigure 1: List of available VMs specific to SQL Server
You can then look through the list and decide which image you want to use for a new Azure VM. Notice that there are multiple rows for a given label, so for 'SQL Server 2014 RTM Enterprise on Windows Server 2012 R2', there are two rows, one with a PublishedDate of 4/1/2014 and the other for 6/9/2014. To ensure you get the one you want, use both the exact Label and the PublishedDate values to get the ImageName property for the image you want.
$imgnm = $imgs | where {$_.Label -eq 'SQL Server 2014 RTM Enterprise on Windows Server 2012 R2' -and $_.PublishedDate -eq '6/9/2014 3:00:00 AM'} | select ImageNameThis gives you the ImageName value of 'fb83b3509582419d99629ce476bcb5c8__SQL-Server-2014-RTM-12.0.2361.0-Enterprise-ENU-Win2012R2-cy14su05', and you use that for your new Azure VM. I use that property to create a new Azure VM configuration.
New-AzureVMConfig -Name 'AVMSQL02' -InstanceSize Basic_A3 -ImageName $imgnm ` | Add-AzureProvisioningConfig -Windows -AdminUsername '[mywindowsadminuser]' -Password '[strongpassword]' ` | New-AzureVM -Location 'Central US' -ServiceName 'AVMSQL02'The New-AzureVMConfig cmdlet creates a VM configuration object, where you specify the name, the size, and the name of the image. Pipe that to the Add-AzureProvisioningConfig cmdlet, which allows you to set up the admin account details. Then, pipe that to the New-AzureVM cmdlet, specifying the location and service name.
Figure 2: Set up admin account details
Now, you can launch RDP and configure the new server. Here are the SQL Server services it automatically runs in the selected VM.
Figure 3: Launch RDA and configure new SQL Server
Using PowerShell, you have a repeatable process to provision and access your Azure VM environment, making the process consistent and much more easily manageable.
Related: Use PowerShell Remoting to Manage SQL Server Efficiently
About the Author
You May Also Like


.jpg?width=700&auto=webp&quality=80&disable=upscale)
