How To Deploy Your App on Microsoft HoloLens 2How To Deploy Your App on Microsoft HoloLens 2
Follow these steps to run your app on a HoloLens 2 device.
July 23, 2024
_(1).png?width=1280&auto=webp&quality=95&format=jpg&disable=upscale)
In this article series, we have set up the HoloLens 2 development environment and created a simple app. I will now explain how to deploy that app.
Part 1. Installing and Configuring Development Tools: This article covers the initial setup required for HoloLens 2 development.
Part 2: Building a Simple HoloLens 2 App: I explain how to build your first HoloLens 2 application.
Part 3: Deploying Your HoloLens App: The final article in the series covers the steps for running your app on a HoloLens 2 device.
Build the App
Before deploying the app, we need to go through the build process. Follow these steps:
Open Unity.
Select Build Settings from the File menu. It will open the Build Settings pop-up.
Click the Add Open Scenes button (as shown in Figure 1).
Click the Build button.
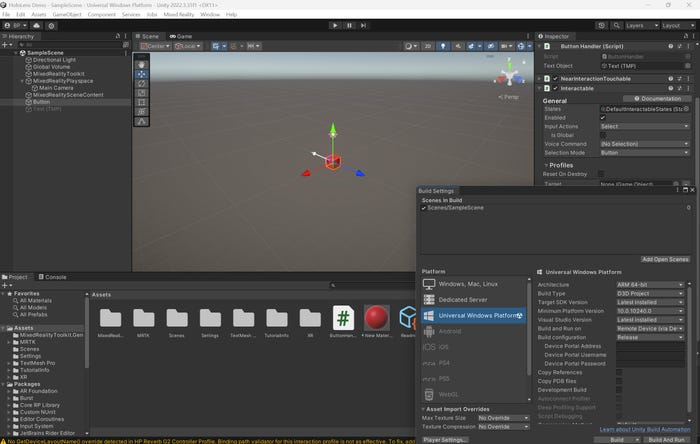
Figure 1. Click Add Open Scenes and then click Build.
After clicking Build, specify a location for the project. You can choose any place, but I recommend creating a subfolder within your Unity Projects folder, such as “HoloLens Demo Build.” Once you select the folder, Unity will start the build process, which takes a few minutes to complete.
Open the Project in Visual Studio
After completing the build process, the next step is to open the project in Visual Studio.
1. Open File Explorer and navigate to the folder containing your built project.
2. Locate the file with the .SLN extension. For example, in Figure 2, you can see a file named “HoloLens Demo.SLN.”
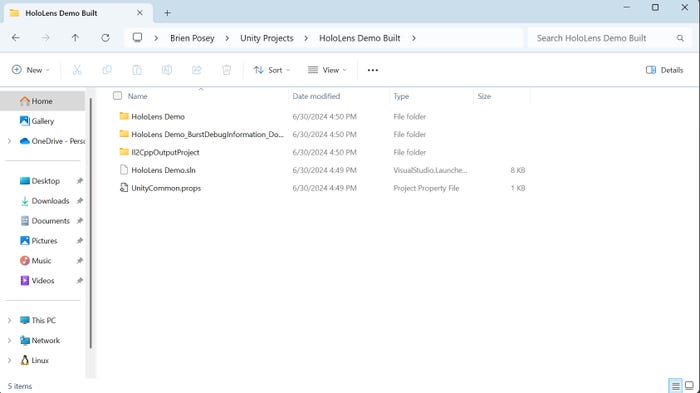
Figure 2. Locate the .SLN file for your project.
3. Right-click the .SLN file and select Open With | Visual Studio from the shortcut menu. It will open your project in Visual Studio (Figure 3).
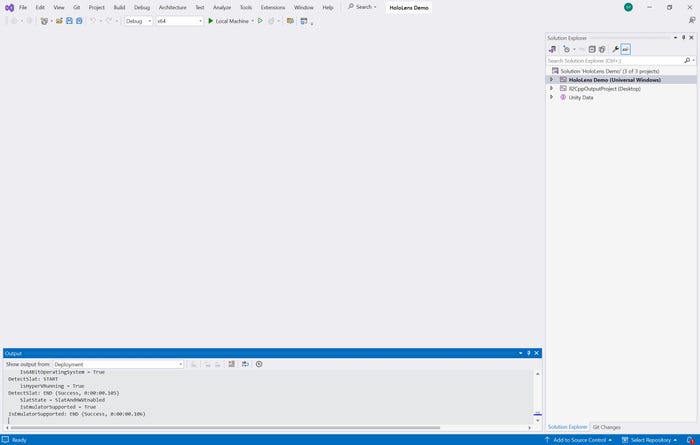
Figure 3. Open the project in Visual Studio.
4. In Visual Studio, locate the drop-down menu at the top of the screen displaying Debug. Click on it and change its value to Release.
5. To the right of this drop-down, you will see an architecture option set to X64. Change this value to ARM64.
6. While at it, click the drop-down to the right of Remote Machine and change the value to Device. Deploying to the HoloLens 2 as a device is simpler because you don’t need to know the IP address of the HoloLens. You can see these options in Figure 4.
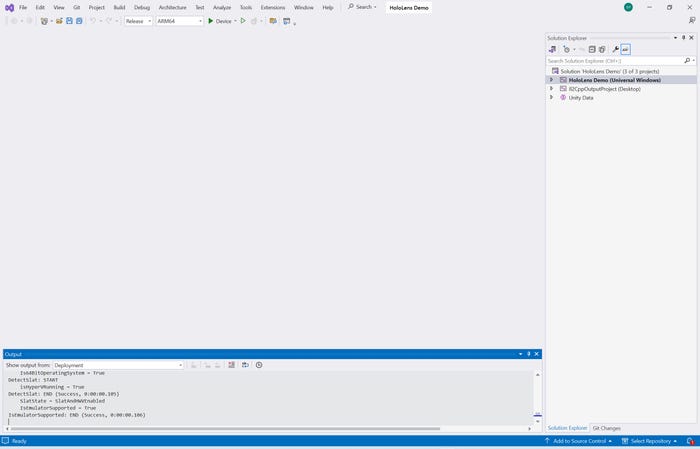
Figure 4. Prepare for a release deployment using the ARM64 architecture.
Enable HoloLens Developer Mode
You can use any HoloLens 2 device as a development platform, including an Industrial Edition HoloLens 2, which I used for this article.
Depending on the updates installed on your HoloLens 2, you might need to enable Developer Mode. Recent updates have made this step unnecessary for some users, but if your device requires it, here’s how to enable Developer Mode:
1. Power up and log into your HoloLens 2.
2. Go to Settings and select Update & Security.
3. Choose For Developers from the left menu. You may encounter a warning like the one shown in Figure 5.
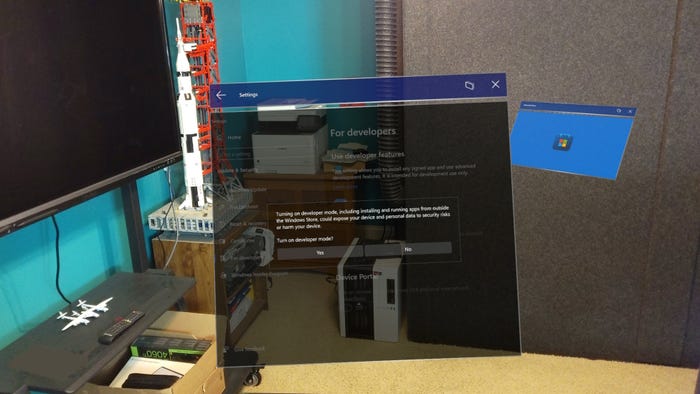
Figure 5. The HoloLens will attempt to discourage you from using Developer Mode.
4. Enable Developer Mode as shown in the interface in Figure 6.
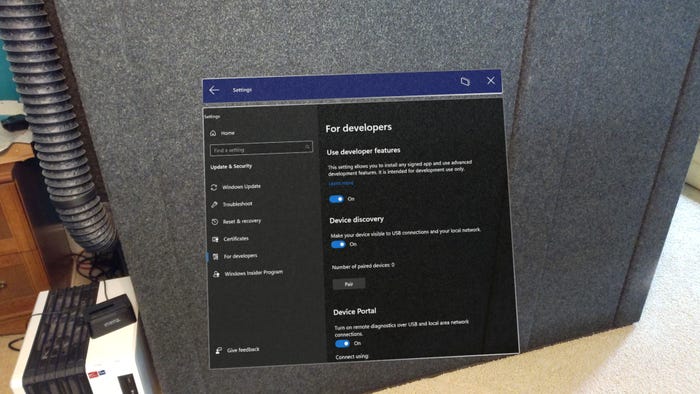
Figure 6. Enable Developer Mode.
5. While enabling Developer Mode, click on the Pair Device button. This action will provide a PIN that you must enter shortly. Based on my experience, this PIN changes each time you reboot the HoloLens. I had to keep my device powered on and continue wearing it as I deployed my app to avoid a PIN change or a deployment error.
Deploy Your App
To deploy your app to the HoloLens, follow these steps:
1. Ensure the HoloLens is powered on and connected to your PC via a USB cable.
2. In Visual Code, click the green triangle icon next to Remote Machine. This action initiates deployment and prompts you to enter the PIN mentioned earlier.
3. Enter the PIN. Visual Studio will then deploy your app to the HoloLens. In my experience, deployment can take some time to complete.
If you encounter an error relating to missing files, you can resolve it by pointing Visual Studio to the Microsoft Symbols server.
In my effort to simplify the app-building process, I didn’t adjust the size or position of the red cube (the “button”). As such, the cube is oversized and positioned on the floor, as shown in Figure 7.
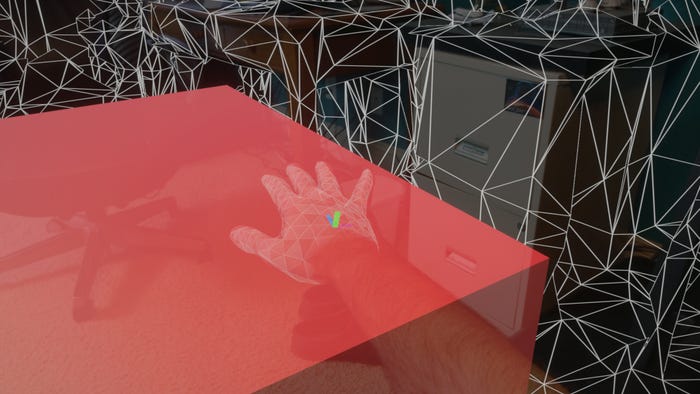
Figure 7. My app runs on HoloLens, although the cube is too big.
About the Author
You May Also Like


.jpg?width=700&auto=webp&quality=80&disable=upscale)
