Storage Spaces Direct on Virtualized Hardware: How to Prepare VMsStorage Spaces Direct on Virtualized Hardware: How to Prepare VMs
Dedicated hardware typically is used when running Storage Spaces Direct in production, but it also can be run on virtualized hardware.
December 22, 2020

One of the big misconceptions about Microsoft Storage Spaces Direct is that it has to run on dedicated hardware. Although dedicated hardware typically is used when running Storage Spaces Direct in production environments, it is possible to run a Storage Spaces Direct cluster on virtualized hardware. Doing so can be useful if you want to get a feel for how Storage Spaces Direct works before deploying it in production. There are also some production workloads that are just well-suited to running on a virtualized Storage Spaces Direct cluster. In this article series, I will show you how to make Microsoft Storage Spaces Direct work in a virtualized environment. This article focuses on preparing VMs for Storage Spaces Direct; click here for an article that focuses on deploying Storage Spaces Direct on virtualized hardware.
Before We Get Started …
There are a few important things to mention before we get started. First, I am basing this article series on making Storage Spaces Direct work in a Hyper-V environment. VMware is beyond the scope of this series.
In addition, the last step of the process involves creating a cluster volume. This volume is thick provisioned, regardless of how you have Hyper-V configured. Additionally, a volume copy will be created on each cluster node.
Finally, this article series is based on the use of Windows Server 2019.
Deploying Virtual Machines
The first step in the process is to create a series of Hyper-V virtual machines in the usual way. For the purposes of this article series, I am creating three virtual machines, each of which will act as a Storage Spaces Direct cluster node. You are, of course, free to use a different number of nodes in your own environment.
Once you have created the virtual machines, you will need to enable nested virtualization. This is necessary because later on we will be installing Hyper-V onto the virtual machines. To enable nested virtualization, open an elevated PowerShell session on the Hyper-V host and run the following command:
Set-VMProcessor -VMName -ExposeVirtualizationExtensions $TrueYou will need to run this command for each of your cluster nodes, as shown in Figure 1.

S2D 1-1
Figure 1
You will need to enable nested virtualization for each cluster node.
Once you have enabled nested virtualization, you will need to enable MAC address spoofing for the VMs that will act as S2D cluster nodes. Otherwise, the nodes will not be able to communicate on the network. The command for enabling MAC address spoofing is:
Get-VMNetworkAdapter -VMName | Set-VMNetworkAdapter -MacAddressSpoofing OnYou can see how this works in Figure 2.

S2D 1-2
Figure 2
This is how you enable MAC address spoofing for your virtualized cluster nodes.
You can use Network Address Translation instead of MAC address spoofing, but MAC address spoofing is easier.
Now that you have enabled nested virtualization and MAC address spoofing, you can go ahead and install an operating system onto each virtual machine. (As a reminder, I am using Windows Server 2019.) You should also domain join each of the virtual machines.
The next thing that you will need to do is to create the virtual disks that will be used by the cluster nodes. For this step, it is necessary to create and attach the virtual disks. However, it is important that you do not initialize the disks or attempt to create volumes.
Because you will need to create multiple virtual hard disks for each node, it’s easier to use PowerShell than to create the disks using the GUI. You can create virtual hard disks by using the New-VHD cmdlet. Here is the syntax:
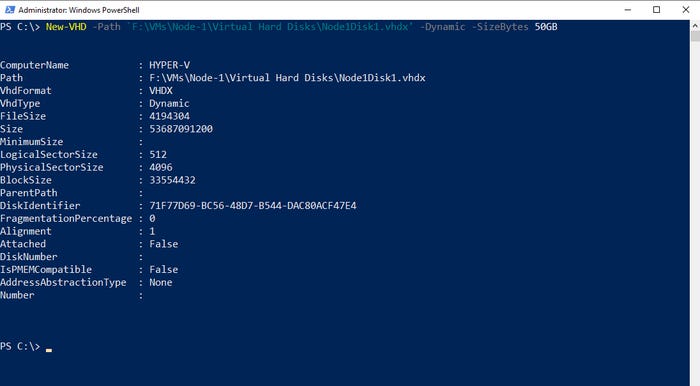
New-VHD -Path -Dynamic -SizeBytes To give you a more concrete example, let’s pretend that you wanted to create a 50 GB dynamically expanding virtual hard disk named Node1Disk1.vhdx at F:VMsNode-1Virtual Hard Disks. The command for doing so would be:
New-VHD -Path ‘F:VMsNode-1Virtual Hard DisksNode1Disk1.vhdx’ -Dynamic -SizeBytes 50GBIn a production environment, you would generally be better off using fixed length virtual disks. In this case, however, I am using dynamically expanding disks to save space.

S2D 1-3
Figure 3
This is how you create a virtual disk.
Although the virtual disks have been created, they are not currently attached to the virtual machines that will eventually act as cluster nodes. You can attach a virtual disk to a virtual machine by using the Add-VMHardDiskDrive cmdlet. Here is the syntax:
Add-VMHardDiskDrive -VMName -Path In the previous example, we created a virtual disk named F:VMsNode-1Virtual Hard DisksNode1Disk1.vhdx. To attach this disk to a virtual machine named Node-1, we would use this command:
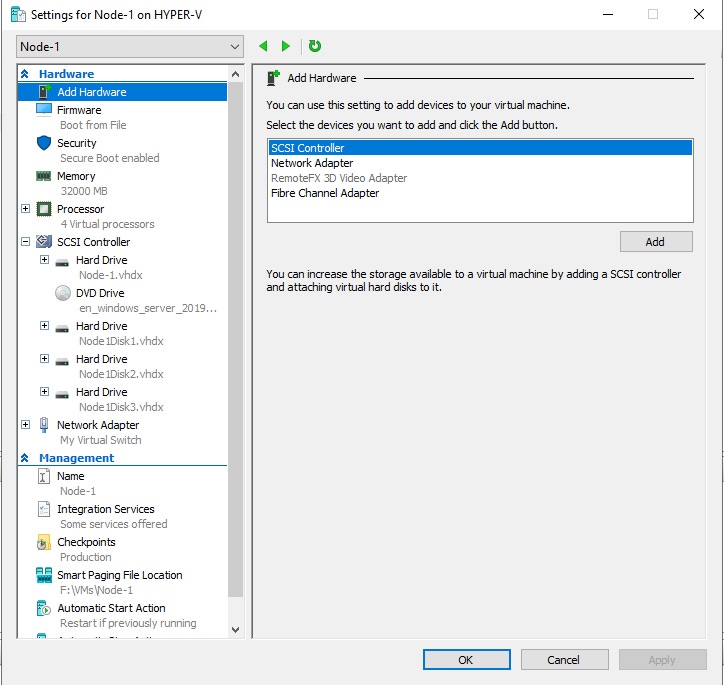
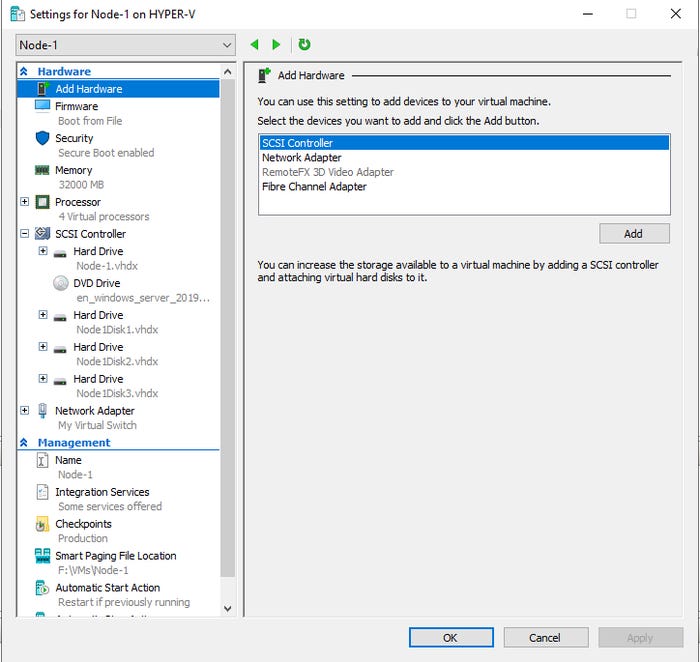
Add-VMHardDiskDrive -VMName Node-1 -Path ‘F:VMsNode-1Virtual Hard DisksNode1Disk1.vhdx’If you look at Figure 4, you can see the commands that I used to add three virtual hard disks to a VM named Node-1. In Figure 5, you can see the virtual machine’s settings (in Hyper-V Manager) and can confirm that the virtual disks have indeed been attached.

S2D 1-4
Figure 4
This is how you link virtual disks to the virtual machines.

S2D 1-5
Figure 5
Each virtualized cluster node has been provisioned with three disks (plus a system disk).
At this point, the virtual machines have been fully prepared for use with Storage Spaces Direct. In Part 2, I will conclude this series by showing you how to create the Storage Spaces Direct cluster and cluster volume.
About the Author
You May Also Like


.jpg?width=700&auto=webp&quality=80&disable=upscale)
