Sharing Registered Server Entries in SQL Server Management StudioSharing Registered Server Entries in SQL Server Management Studio
We’re dedicating at least one article per month here at SQL Server Pro on features, usability, and navigation inside SQL Server Management Studio (SSMS). This month I wanted to build on my introduction to the Registered Servers window by showing you how you can share the listing and categorization of SQL Server instances throughout your environment with others on your team.

We’re dedicating at least one article per month here at SQL Server Pro on features, usability, and navigation inside SQL Server Management Studio (SSMS). This month I wanted to build on my introduction to the Registered Servers window by showing you how you can share the listing and categorization of SQL Server instances throughout your environment with others on your team.
Collaboration is vital in organizations with multiple Database Administrators, Developers, Engineers, and Architects. One of the foundational points of collaboration is ensuring everyone has access to the same information. By sharing the work you’ve put into registering SQL Server instances if you followed along with my earlier article on the topic then you’ll want to share that work with the others you collaborate with on a daily basis.
Importing and Exporting Registered Server Entries
Let’s take a look at where we left off in the previous article: the Registered Servers window in SSMS:

Where we left off you were introduced on how to:
Open the Registered Servers window
Navigate through the various nodes
Register new Database Engine instances
Move instances between nodes
Categorize instances
Launch and execute queries against multiple instances at once
Let’s move on now to talk about sharing that work. The process is very simple, but not well known. It starts with a simple right-click on the node you wish to export; in this example we’ll export all registered servers by exporting at the Local Server Groups level:

You’re greeted with a pop-up window you saw in the first article. Select Tasks and then Export from the context window:

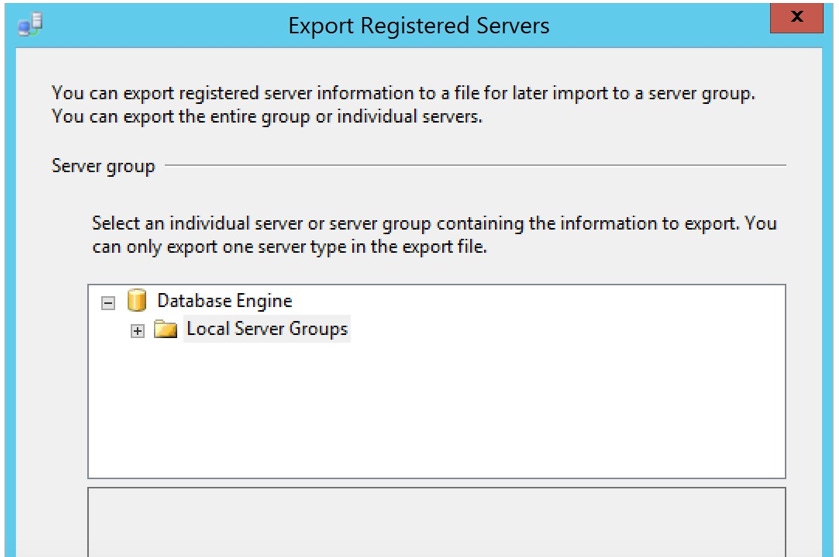
At this point you’ll be greeted with a window for selecting the location you want to export the file to and an option to either include or omit login and password details from the exported entries. This is one of the reasons I prefer to use Windows Authentication whenever possible. Exporting of registered server entries with security information included is a great way to violate security mechanisms as well as to lose your job.

After selecting the file location and making that critical choice of whether to include user names and passwords clicking OK will save that selection out to the file path specified and the export process is complete.

A Few Recommendations About Placement of Shared Registered Servers
When dealing with any area of data and your custodial responsibilities in terms of securing the environments you’re tasked with supporting it’s vital to ensure you’re making wise choices. In the case of Registered Server exports I always recommend:
Using Windows Authentication for all Registered Servers entries
If you need to persist a connection in a Registered Server using a SQL login for sake of, perhaps testing an end user’s experience when connecting to an instance and the underlying data environment be sure to:
Secure whatever device is being used for SSMS
Only export with the “Do not include user names and passwords in the export file” selected.
Export to secured volumes that only those who should have access to the instances being exported have access.
The Import Process
The need to export these settings is only important if you intend to import them. I’ve framed this article in the sharing and collaboration process but I rely on using Registered Server exports when migrating laptops as well.
The process for importing is just as easy as the export process. Keep in mind that easy means that you can also easily do harm. Whenever you import registered server entries into an install of SSMS you’ll overwrite any existing records for the node you’re importing into and all of it’s sub-nodes. Please keep that in mind.
To import:
Starting with the empty install of SSMS:

Right click on whichever node you want to import into. In this case, since we’re looking at a clean install of SSMS use Local Server Groups.
Select Tasks as you did before from the pop-up menu and this time choose Import from the available options:

You’ll then be prompted for the path to the export file. Select the file you want to import records from and click OK:

Once done you’ll be greeted with the environment that precisely mimics the exported environment with – or without the underlying security contexts depending on what your selection was earlier on.

Conclusion
The process of exporting and importing Registered Servers values is a timesaving mechanism for keeping your SSMS experience common between your team members or for easily migrating your SSMS experience between versions of SQL Server Management Studio or in changes to your hardware running SSMS. Stay engaged with this series on SQL Server Pro as we continue to mine hidden gems inside of SQL Server Management Studio. It’s all about helping you get more done by working smarter –not harder.
About the Author
You May Also Like


.jpg?width=700&auto=webp&quality=80&disable=upscale)
