How Windows Integrity Streams Provide Bit Rot Protection
Here are the steps to take to leverage Windows integrity streams for bit rot protection.
June 24, 2020

Bit rot has always posed a special problem for storage administrators. Unlike disk failures or array failures, bit rot (the gradual degradation of data) happens slowly over time, and might not always be detected. One way to provide bit rot protection is to leverage a Windows storage feature called integrity streams.
As you probably know, one of the key benefits to using the ReFS file system is that it uses checksums to maintain data integrity. What you might not realize, however, is that by default these checksums only monitor the integrity of a file’s metadata. Fortunately, you can also monitor the actual file data for corruption by enabling integrity streams, thereby providing a level of bit rot protection.
Integrity streams work by creating checksums for files. When someone attempts to access a file, Windows compares a current checksum against the stored checksum to determine whether the file is corrupt. What happens next depends on whether ReFS is mounted on resilient storage.
If resilient storage is not being used, then any attempt to access a corrupt file will simply return an error message. As such, if you aren’t using resilient storage, it may be better to leave integrity streams disabled in case portions of a corrupt file are still usable.
If resilient storage is being used, ReFS will actually attempt to repair the corruption. ReFS will use the underlying resiliency to recover the file. If it is successful, it will perform a corrective write operation, thereby replacing the corrupt data with good data. If the correction fails, ReFS will return an error rather than opening the file.
To show you how integrity streams work, I set up a virtual machine running Windows Server 2019 and created an ReFS volume. I also copied a few files to that volume.
The first thing that I want to show you is how to tell whether integrity streams are enabled for a file. The cmdlet used for doing so is Get-FileIntegrity. You will need to append the filename to this cmdlet, as shown in Figure 1. Keep in mind that this command will produce an error if you reference a file on an NTFS volume.

Figure 1
You can use the Get-FileIntegrity cmdlet to find out if integrity streams are enabled for a file or folder.
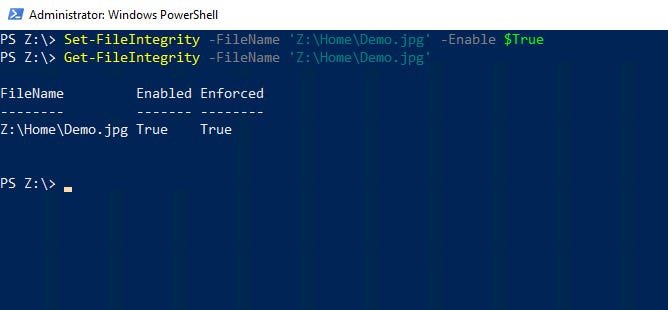
In this particular case, integrity streams are not enabled for the file, so let’s go ahead and enable the function. The cmdlet that is used for turning integrity streams on or off is Set-FileIntegrity. As with the Get-FileIntegrity cmdlet, you will need to append the filename. There is also a parameter named Enable that can be set to $True or $False to enable or disable integrity streams. You can see how this process works in Figure 2.

Integrity Streams 2
Figure 2
You can use the Set-FileIntegrity cmdlet to enable integrity streams for a file.
In case you are wondering, file integrity can also be enabled or disabled at the folder level or at the volume level. Although enabling integrity streams at the volume level seems like a smart thing to do, it is important to keep in mind that integrity streams incur a performance penalty. As such, enabling integrity streams for an entire volume might not always be the best option.
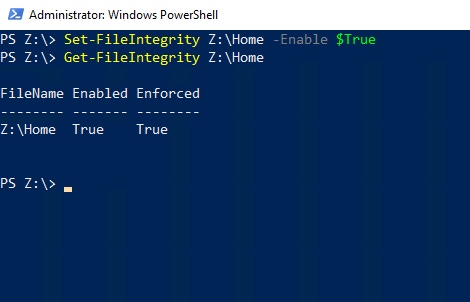
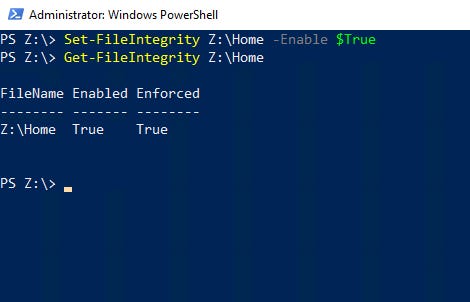
If you decide to enable integrity streams for a specific folder or volume, you can do so by using the same command as before, but replace the filename with the name of the folder or volume. These are the commands used to enable and then verify file integrity streams for a folder called Z:Home.
Set-FileIntegrity Z:Home -Enable $True
Get-FileIntegrity Z:Home
You can see how this works in Figure 3.

Integrity Streams 3
Figure 3
This is how to enable integrity streams for a specific folder.
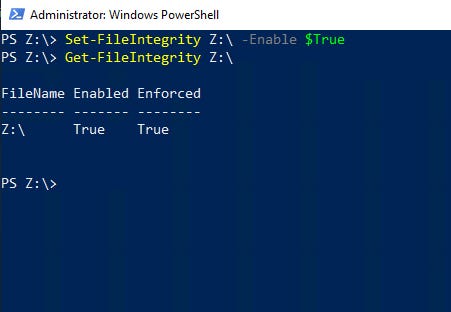
The process works similarly for enabling integrity streams for an entire volume. These commands enable and then verify integrity streams for the entire Z: volume.
Set-FileIntegrity Z: -Enable $True
Get-FileIntegrity Z:
Figure 4 shows these commands in action.

Integrity Streams 4
Figure 4
This is how you enable integrity streams for an entire volume.
So, as you can see, Windows Server makes it easy to enable integrity streams. The important thing is to balance your need for file integrity against your storage performance requirements.
About the Author
You May Also Like


.jpg?width=700&auto=webp&quality=80&disable=upscale)
