How to Use TreeSize to Check Disk Space UsageHow to Use TreeSize to Check Disk Space Usage
TreeSize helps you figure out how your storage space is being used and what you can do to reclaim some of that space.
September 1, 2021

It’s amazing just how quickly storage space can be depleted in a Windows environment. The available space just seems to decrease over time, even if you are not doing anything that seems like it should consume a lot of space. Fortunately, there is a free tool that does a great job of helping you to figure out how your storage space is being used and what you might be able to do to reclaim some of that space. The tool is called TreeSize.
TreeSize is likely designed for use on Windows 10, but out of curiosity I also tried installing it on Windows Server 2019. The software seems to work just as well on Windows Server as it does on Windows 10 machines.
I initially downloaded TreeSize because my primary desktop computer was running low on storage space and I needed to figure out where my disk space had gone. I found TreeSize to be very lightweight, easy to use and, most importantly, effective. Within a matter of a few minutes, I managed to locate several things that I could remove from my PC to reclaim some of my lost disk space.
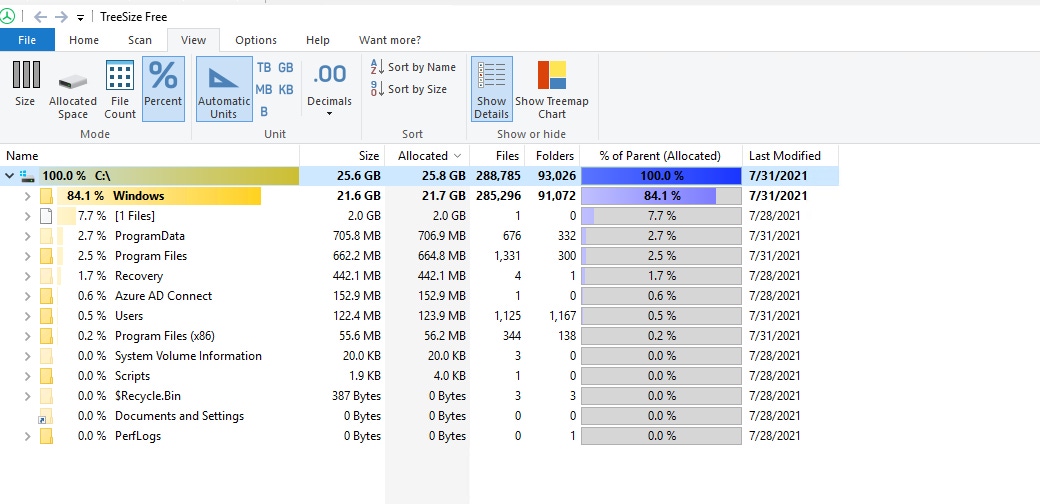
For the purposes of this article, I installed TreeSize on a Windows Server 2019 machine that was running a lab deployment of Azure AD Connect. Upon launching TreeSize, it automatically scanned the server’s hard drive and presented me with the screen shown in Figure 1.

check disk space 1
Figure 1
This is the output generated by running TreeSize on Windows Server 2019.
As you look at the screen capture shown above, you will notice that the C: drive is selected. You will also notice that the C: drive is listed as being 100% allocated. This does not mean that the C: drive is completely full (it isn’t), but rather that 100% of the data residing in the C: drive resides in either the root directory or one of its subfolders. While that statement seems completely obvious, it is an important concept because it extends to all of the subfolders.
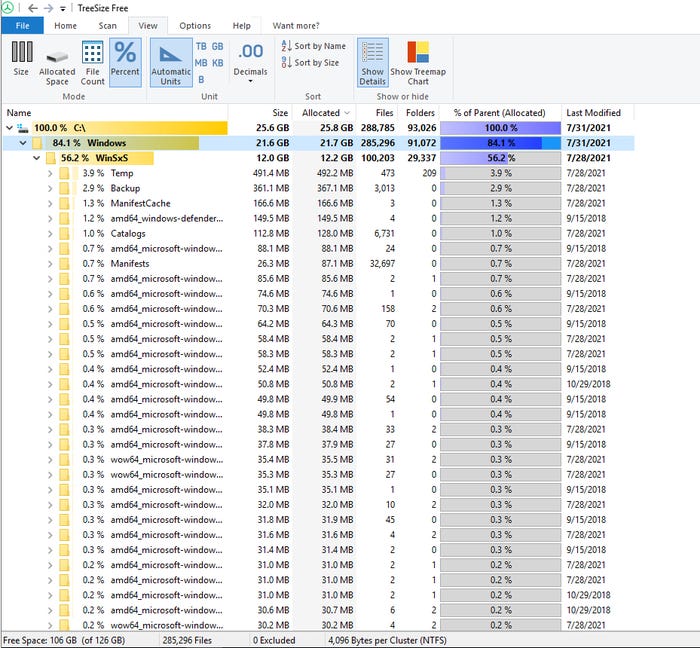
Just beneath the C: drive is the Windows folder. The Windows folder is listed as 84.1%, meaning that just over 84% of the C: drive’s contents are in the Windows folder or in one of its subfolders. You break this down further by expanding folders. If you look at Figure 2, for instance, you can see that I have expanded a few folders and found that over half of the data on this machine’s C: drive resides in the C:WindowsWinSXS folder. Additionally, none of the subfolders beneath the WinSXS folder contains more than 3.9% of the total volume of data residing on C:. This means there is a lot of data that is being stored in C:WindowsWinSXS, but not in its subfolders.

check disk space 2
Figure 2
Over half of this machine’s data is located in the C:WindowsWinSXS folder.
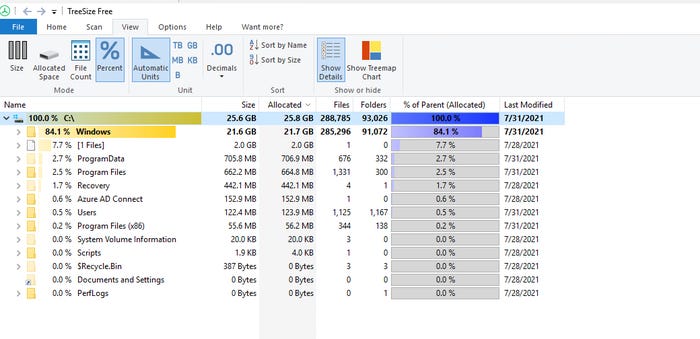
TreeSize’s default behavior is to express each folder’s size as a percentage of the total space that has been consumed on the disk. However, there are other ways to view the data. As you can see in the previous figures, there are several icons in the taskbar at the top of the window. These icons allow you to view the space consumption in terms of total size, allocated space or file count. Switching to Size mode, for example, shows you the total space (in gigabytes) being consumed by the various folders.
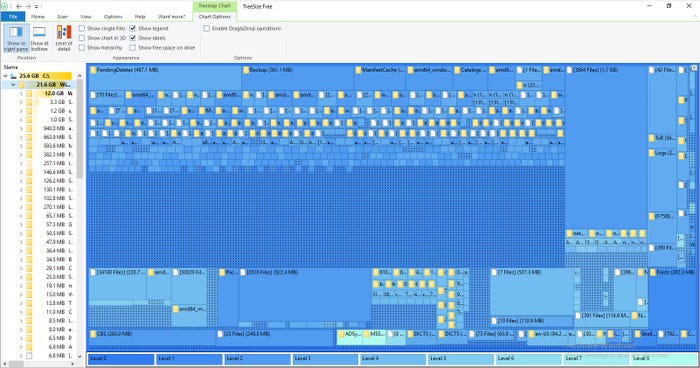
Tree Size also contains a chart option that displays the data in a different way. Although the chart option can take a bit of getting used to, it can sometimes reveal details that are easy to overlook in the tree view. If you look at Figure 3, for example, you can see that nearly 500 MB of space is currently being consumed by pending deletes. Another 361 MB of space is being taken up by backups.

check disk space 3
Figure 3
The chart view shows storage consumption data in another way.
It is worth noting that, as with so many other software applications, there are both free and paid versions of TreeSize. In addition to the free edition, Jam Software offers a Personal and a Professional edition. Both paid editions add the ability to break down scan results by file type, owner and other criteria. They also include a file search and deduplication feature, as well as the ability to export the scan results to Excel, HTML and Email. The main difference between the Professional and the Personal edition is that the Professional edition supports command line operations, whereas the Personal edition does not.
About the Author
You May Also Like


.jpg?width=700&auto=webp&quality=80&disable=upscale)
