3 Simple Ways to Install and Run a Virtual Machine on Ubuntu3 Simple Ways to Install and Run a Virtual Machine on Ubuntu
Learn how to use VirtualBox, KVM, and virt-manager to create and manage virtual machines on Ubuntu, tailored to different expertise levels and use cases.

One of the nice things about Linux-based operating systems like Ubuntu is that there's often more than one way to accomplish a task — and running a virtual machine (VM) is no exception. Ubuntu supports several different tools and approaches for setting up virtual machines.
This article covers three of the most popular ways to run VMs on Ubuntu, as well as the pros and cons of each option and the basic steps involved.
Virtual Machines on Ubuntu: The Basics
Before diving into different methods for running virtual machines on Ubuntu, let's go over the fundamentals of what a virtual machine is and why you may want to use it.
A virtual machine is a computer or server that is emulated using software. Using a virtual machine, you can set up operating system environments that are different from those used by the host operating system — so a virtual machine running on Ubuntu could host another Linux distribution inside the virtual environment, for example.
You can also often install Windows or another non-Linux system inside a virtual machine, although not all virtualization platforms support this option.
Setting up a virtual machine on Ubuntu may be useful if you want to experiment with a different operating system, or if you need to use two operating systems at the same time but only have access to one computer. In addition, because the software environment inside the virtual machine is tightly isolated from the host computer, virtualization is handy in situations where you want to separate applications from each other.
How to Set Up a Virtual Machine on Ubuntu
Now, let's walk through the three main options for running virtual machines on Ubuntu. I used an Ubuntu 22.04 system to create this tutorial, but they should work on any Ubuntu version released in the past five years or so (and they may very well work on older Ubuntu releases, too, since virtualization technology on Linux is very mature and has not changed a whole lot over the years).
1. Create a VM with VirtualBox
If you're new to virtualization (or to Ubuntu), the easiest way to set up a virtual machine is probably using VirtualBox. VirtualBox is a free, open-source virtualization platform developed by Oracle. It offers a user-friendly graphical interface, which makes it easy to set up and run VMs without having to use the command line.
To use VirtualBox, first install it from the Ubuntu Software Center or using the following command:
sudo apt install virtualbox-qtThen, launch the application. You'll see a screen like the following:
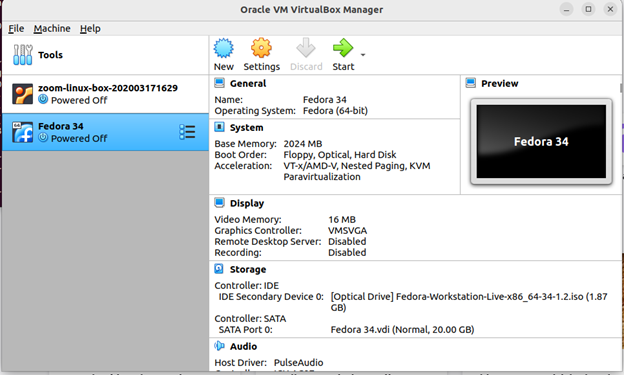
To create a new VM, navigate to Machine>New, which opens the following window:
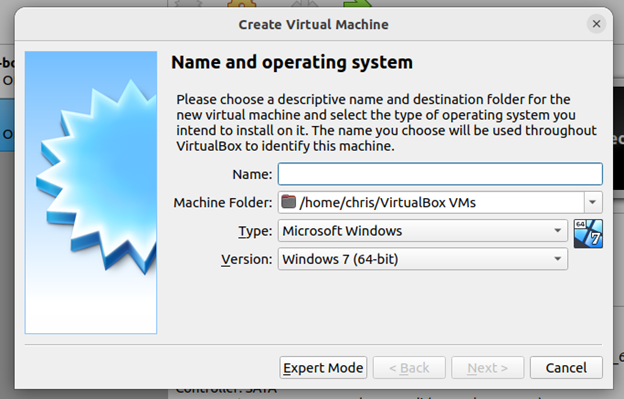
Enter a name for your VM, then work through the following screens to set up your VM. If you're new to VMs on Ubuntu, the default options should work.
After creating the new VM, you'll see it listed in the left-hand pane of the main VirtualBox screen:
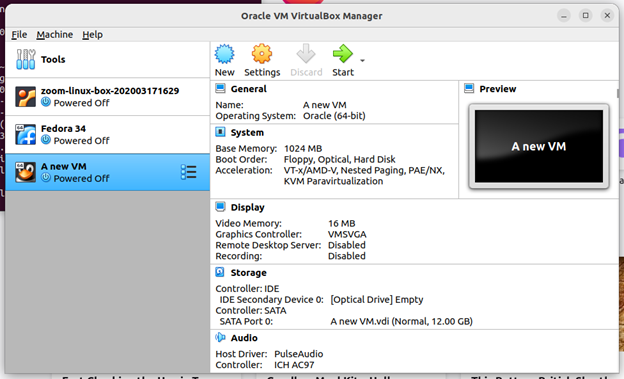
In this example, I named the new VM "a new VM." To start it, click the green Start button near the top-center part of the window.
When the VM starts, VirtualBox will ask you to select a boot medium. In most cases, you'll want to use an ISO file for the operating system you want to install and run inside the VM. (For more on working with ISOs, check out our article on installing Ubuntu using an ISO file — but note that you can use an ISO to install almost any type of operating system, not just Ubuntu.)
2. Create a VM with KVM on the command line
KVM is a virtualization framework built into the Linux kernel. It's fully open source, and it typically is more efficient and runs faster than VirtualBox. The tradeoff is that KVM is a CLI-only tool (although graphical front ends are available for it, as we note below) that can require more of a learning curve than VirtualBox.
To install KVM, run:
sudo apt install qemu-kvmOnce KVM is installed, starting a VM is as simple as running a command like the following:
kvm -cdrom ubuntu-20.04.4-desktop-amd64.isoThis tells KVM to start a virtual machine and boot from an ISO file named ubuntu-20.04.4-desktop-amd64.iso. It will open a window that looks like this:
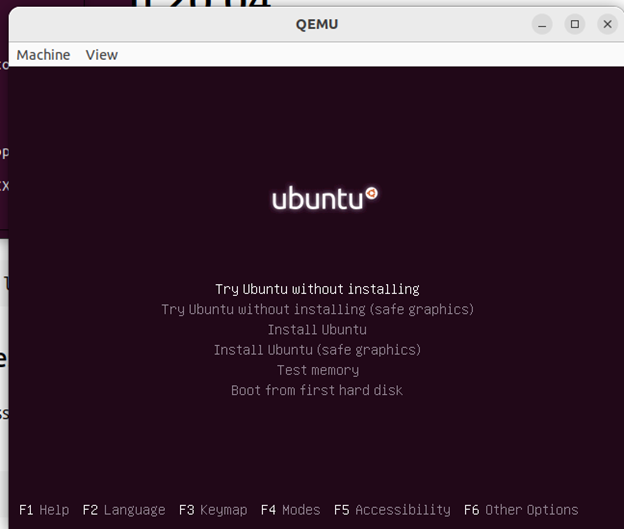
Note that in this example, we didn't specify a virtual hard disk, so we won't actually be able to install anything inside the guest operating system or save any data permanently. But you can play around with the guest operating system in a virtual environment. Starting VMs with KVM like this is handy if you want a quick way to launch a VM that you'll only use once.
It is eminently possible to configure virtual hard disks for KVM, too, and you can specify many other options (including the amount of virtual memory to assign to the VM). But we'll save details on those configurations for a future tutorial.
3. Run a VM on Ubuntu with virt-manager
If you want to set up a VM using KVM without having to learn CLI commands, you can use virt-manager, an open-source graphical interface for KVM. Virt-manager uses KVM on the back end to power VMs, but it provides a point-and-click interface where you can configure and manage VMs, making it more friendly toward less experienced users. Virt-manager also provides a graphical interface for configuring virtual disks, which makes it easy to run VMs with permanent storage.
To install virt-manager on Ubuntu, search for it in the Software Center or run this command:
sudo apt install virt-managerThen launch the application with:
sudo virt-manager(Note that if you try to run virt-manager without using sudo, it probably won't be able to connect to the KVM service on your system, which requires root privileges by default.)
The virt-manager interface looks like this:
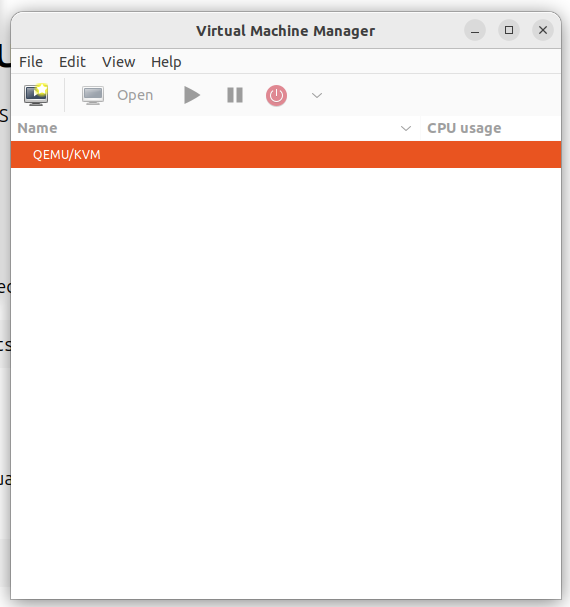
To create a VM, navigate to File>New Virtual Machine. This opens a window like the following:
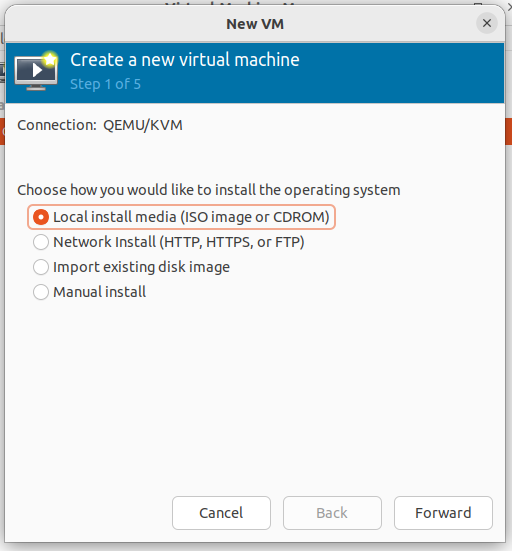
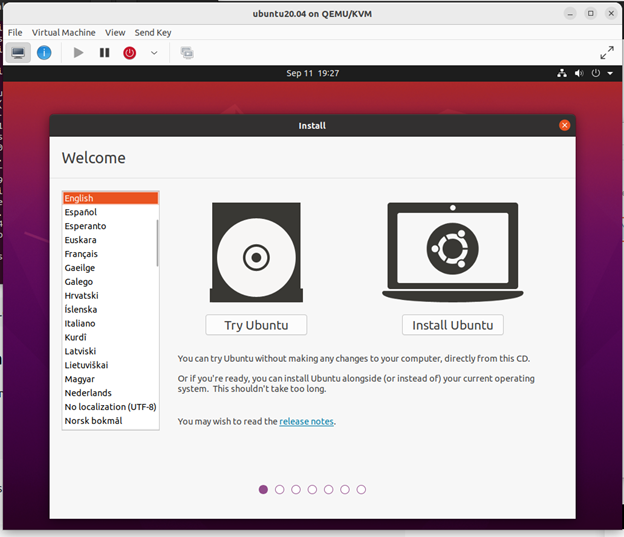
Work through the configuration options, then save your new VM. It should start automatically, but if not, you can launch it by pressing the "play" button in virt-manager. Here's an example of what you should see when you run your VM:
If you've read this far, congrats! You've learned three ways to go about launching VMs on an Ubuntu system.
About the Author
You May Also Like


.jpg?width=700&auto=webp&quality=80&disable=upscale)
